Hurray! You want to do the 30-Day Blog Challenge with me! And you want to put the badge on your BlogSpot (Blogger) blog but . . . “Uh oh,” I hear some of you saying. “Now, how the heck do I do that?”
Fear not, intrepid writer. I’m going to show you how easy it is. (Note this is a Windows PC Tutorial.)
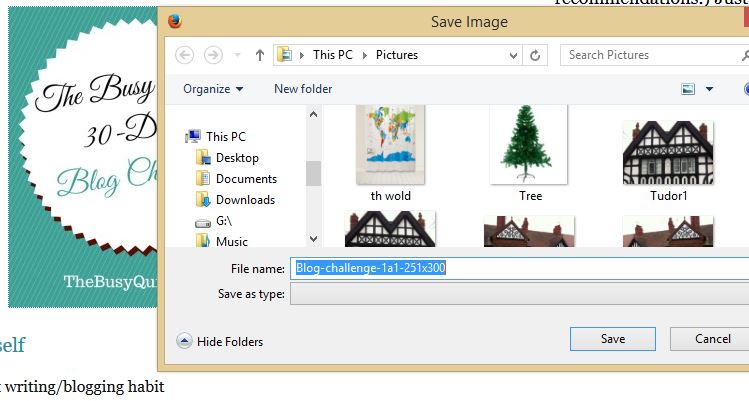
1. Hover your mouse over the badge image you want to use. Right click and select the option, “Save image as,” or “Save picture as.” A box will pop up to allow you to name and save the image into whatever folder you choose. Don’t forget where you saved it!
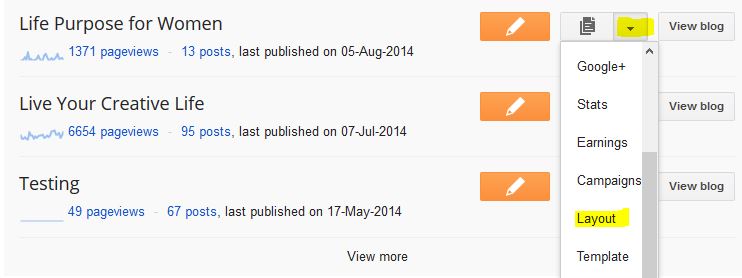
2. Now sign in to your BlogSpot dashboard. Click the down arrow next to the blog you want to update (highlighted in yellow) and then scroll down and click on “Layout.”
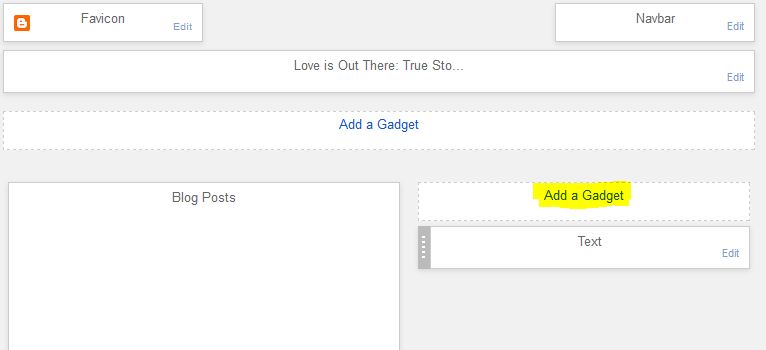
3. The layout of your blog will probably look very much like this. Click “Add a Gadget.”
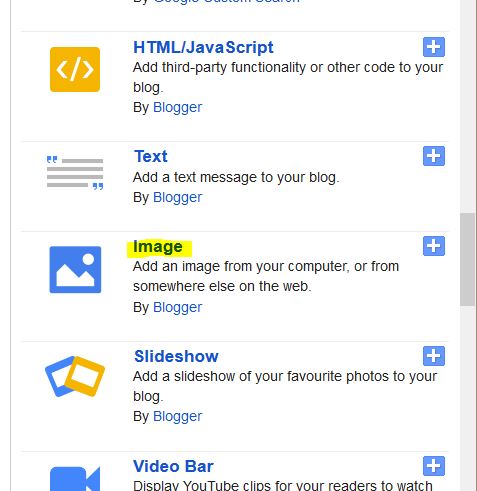
4. A pop up window will appear with the various choices you have of “gadgets.” Choose “Image.”
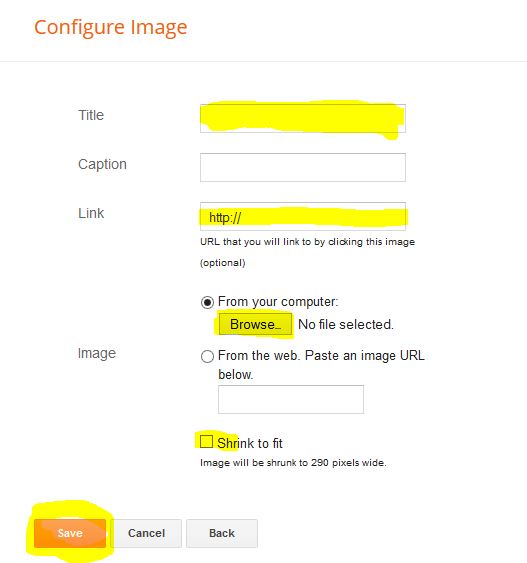
5. Now it’s time to use that image you saved. In the “Configure Image” box, click the “Browse” button and when the browse window pops up, find your image and select. It will start to load.
In the “Link” field, copy and paste the link back to the site your Badge image connects to. (For our Blog Challenge, you would copy and paste: https://thebusyquill.com/30-day-blog-challenge/ )Don’t forget to write a fun little Title, too (I used, “I’m Part of This Challenge!”). I find it helpful to check the “Shrink to Fit” box so your image isn’t out of balance with the rest of your blog. And then hit “Save.”
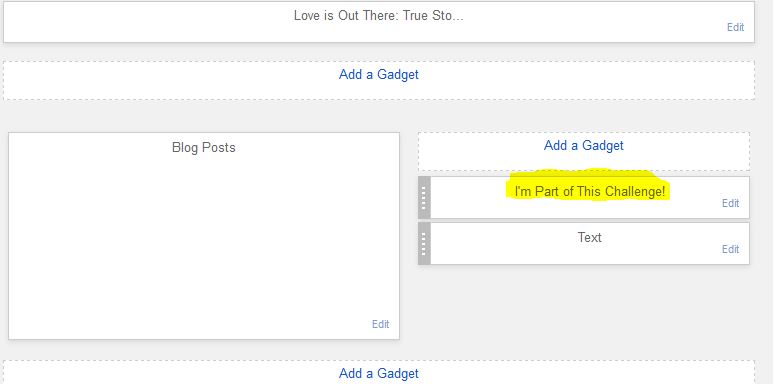
Your new gadget will now feature on your Layout. You can drag and drop it to a new position if you prefer. IMPORTANT: Don’t forget to click the orange “Save Arrangement” button up above.
And that’s it! Easy – and now you have a new skill that once eluded you. 🙂
Let me know how that all worked out for you!


[…] BlogSpot / Blogger user instructions are here: How to Add a Badge on Blogger […]